CLICK HERE FOR FREE BLOG LAYOUTS, LINK BUTTONS AND MORE! »

Wednesday, July 27, 2011

Ghosts

I have started on a Halloween Sampler quilt. I'm usually not into these holiday themed fabrics (except for the Christmas ones, which I love) but I wanted to make something that my students would like to have around the classroom. I have made the six ghost blocks so far. Two each in three black on white fabrics.

I appliqued the eyes and nose.

I still have to cut and piece a bat block, a pumpkin block, a witch block, and two star blocks. I have also started starching my fabric for more precise cutting and piecing. I'm not sure how much of a difference it's making, but I do like the feeling of the stiff fabric.

Riley Blake Givaway

Have you seen the quilt contest on the Riley Blake Blog? They're hosting a contest for quilts made with Riley Blake fabrics, and there are some great prizes!

Sunday, July 24, 2011

Fabric Flower Necklace X 2

I recently made fabric flower necklaces using two different techniques. The first one I made was a chain of puffy flowers.


The tutorial can be found here. It's pretty easy-to make a flower just cut out a bunch of fabric circles, scrunch them up, and glue them onto a circle of felt. I love, Love, LOVE this necklace. the colors turned out really well, I think.

I found a tutorial for this second necklace here, on my friend Laura's blog.

This one was even easier than the first one. Just take a strip of fabric, twist, roll, and glue. I love both of these necklaces. The first one is great if you want to get dressed up in a little strapless dress, and the second one looks best with a casual tank top.

Monday, July 18, 2011

Other Baby Things

Around the time I was piecing the baby quilt I realized that I could use my sewing machine for many things besides quilting. I started by appliqueing some onesies. How hard could it be? Hard. HARD. The onesie fabric stretches and it’s nearly impossible to stitch around the applique using the machine and not stitch some other part of the onesie in. In the end, they turned out pretty cute.

I did enjoy adding the ruffles to the backs, as they are for a little girl.
I also had a great time stitching up these cute bibs that I found in the Summer 2011 issue of Quilts and More. The creator was challenged to make something using a pack of charm squares and a fat quarter. I had a pack of charm squares left over from when I made my first quilt. The company sent me the wrong kit and didn’t make me send it back. Notice that these bibs are in the same fabric as Quilt #1.


Originally I used Velcro, but after consulting some new Mommies I found that children can easily pull the Velcro bibs off of themselves. So I made a trip to Jo-Anns to purchase this nifty snap-attacher.
They are really called Grommet Pliers but I like snap-attacher so much better. I think they look much more professional with the snaps than they did with the Velcro, and let’s be honest- I was pumped to have the excuse to buy another gadget.
I was enjoying using my sewing machine for something other than quilting, so I also tried my hand at these baby shoes.

They are called Kimono shoes, I guess because the fabric wraps all the way around. I don’t know if the will stay on a baby’s foot or not. I’ll report back in October, when she’s old enough to try them out.
I didn’t have much time for sewing after pumping out all of those baby shower items, but I did manage to make a few more bibs (in Lilly & Will and Lilly & Will II and some left over Verna by Kate Spain) for two soon-to-arrive babies of Robbie’s friends.


A Baby Quilt

Around the time I was finishing up Robbie’s Quilt, a friend of mine from work told me she was pregnant. Yes!! I had been waiting for the opportunity to make a baby quilt and I poured over my quilting magazines looking for the perfect pattern. It didn’t take long to find it. In an old issue of Quiltmaker I found a pattern in cream, green, and brown flannels that was made up of only two alternating blocks: a nine-patch and an appliqued fleece sheep. At the time she didn’t know if she would be having a girl or a boy, and this pattern would be great for either one. Plus, I knew she would like the colors. I set about cutting and sewing and immediately regretted my decision to use flannel instead of cotton. Flannel stretches and distorts. No matter how carefully I cut and sewed, I just couldn’t get the seams to line up. I started to get frustrated, but soon reminded myself that this is only the 5th quilt I’ve ever made and before I started quilting I had never even used a sewing machine before.


The applique part was easier, and I even used one of my decorative stitches to create the sheep’s’ eyes.
In the end it went together well, and I’m sure I’m the only one who notices those seams that are just a little “off”.
I stitched in the ditch between the blocks and stitched an X over the nine-patch blocks. I also quilted sheep around the boarder. I added a cute label to the back (something I know I should do every time) and finished just in time for the baby shower!

Thursday, July 14, 2011

Watermelon Finish

A few posts ago I told you about the Juicy Summer Table Topper I was making. It's finished!

I pieced the watermelon and appliqued the stars and seeds. I stitched in the ditch and stippled the pink part of the melon (my first time stippling!)I think it turned out pretty well!


Monday, July 11, 2011

Another Cute Bag

I wanted a quick and easy project today. I also wanted to take a break from hand sewing binding, as I feel like I've done nothing but that. I finished binding Playful Pinwheels and went straight on to the Juicy Summer Tabletopper. I went with a bag pattern from the Spring 2011 issue of Quilts and More. You can find the pattern and instructions here. There are also instructions to make a messenger bag version (longer handle) but I preferred the shoulder bag size. The bag is reversible, but I went with a plan brown lining so I probably won't be flipping it around too often.

Please excuse the grubby hook it is hanging on and the fact that I forgot to empty it before I took that picture. Here's what it looks like laying flat.

This bag was a piece of cake to make. It was seriously easy peasy lemon squeezy. Even easier than the Summer Bag I told you was so simple. And all you need is a half yard cut of two different fabrics!

Sunday, July 10, 2011

Playful Pinwheels

I enjoyed branching out my sewing projects, but I was anxious to get back to quilting. I had a few kits waiting to be pieced, so I chose a baby quilt in yellows and blues that would be suitable for a boy or a girl. It is a pinwheel pattern which I love, love. There is something about that playful shape dancing across the quilt that just makes me smile each time I see it.


Upon further inspection of the pattern I realized that these weren’t just any pinwheels…they were 3-D!! The triangles that make up the pinwheels were actually prairie points. Even better, they had pompoms at their centers which upped the cuteness factor, not to mention the fact that they hide the center pinwheel points that don’t always quite match up.

I used the Clover Pompom Maker to quickly stitch up and attach those bad boys. What a fun tool! I wanted to back it with something extra soft so I looked around blogland for some ideas. It seemed that Minkey was the way to go. I read the warnings about stretching but I also found a post about a spray adhesive that I could use to temporarily glue the backing to the batting, thus preventing stretching. It worked like a charm!

I stitched in the ditch, hand sewed the binding, and I was finished!

Friday, July 8, 2011

Do You Relish?

Have you ever thought about menu planning? I don't mean selecting a few meals to make before going shopping for the week, I mean mapping out all of your meals and printing out an instant shopping list for all of your ingredients. Impossible, you say? Not with Relish! For about $7 a month (less if you buy a year-long package) you get a subscription to an amazing recipe service. Every Thursday you will get an email telling you to log into your Relish! account. There will be about 15 meals including some chicken, beef, pork, vegetarian, and a dessert. Select the recipes you would like to make, and instantly create a pdf of your shopping list for ALL INGREDIENTS needed to make your selected meals. Even better: The list is organized by grocery store aisle!! all you have to do is search your kitchen and pantry and cross out the items you already have. Last week Robbie made this shrimp and black bean salad.

It was delicious!! We added avocados and a little extra sauce, and cut the green onions in half.

Robbie's Colorful Shrimp and Black Bean Salad (inspired by Relish!)

2 cups frozen corn, thawed
1 avocado, diced
1 15-ounce can black beans, rinsed and drained
1/2 red bell pepper , chopped
1 4-ounce can diced green chiles, drained
1/4 cup cilantro, minced
2 green onions , chopped
1 pound precooked shrimp, peeled and deveined
1 teaspoon ground cumin
1/4 teaspoon black pepper
2 garlic clove(s), minced
2 teaspoons white wine vinegar
2 teaspoons lime juice
2 teaspoons water
3 tablespoons olive oil
[1] Mix together corn, avocados, black beans, red pepper, chilies, cilantro, green onions and shrimp. In a small bowl, combine the cumin, pepper and garlic. Mix into a paste.

[2] Add vinegar, lime juice and water to garlic mixture and mix well. Whisk in olive oil. Pour dressing over corn, bean mixture and stir well.

Try out Relish!
This week's recipes include Beef Sukiyaki Noodles with Spring Rolls, Chicken with Pomigranite Mint Marinade, Grilled Jerk Shrimp with Watermelon Salsa, and Creamy Champagne Chicken. YUM!!

Juicy Summer Table Topper

I am just obsessed with the summer issue of Quilts and More. I’ve already told you about the purse. But there is another project in it that I am just dying to make. It’s a cute summer table topper and it looks like it will go together pretty quickly. I combined some scraps from my stash (yes, I have enough fabric to consider it a stash now!!) with some yardage and fat quarters that I purchased especially for this project. I did all the cutting, now I’m ready to start sewing!!


When I finish it will look like the picture on the top right cover of Quilts and More.


A Summer Bag

I was dying to hone my sewing skills, so I found this cute little handbag in the Summer 2011 issue of Quilts and More.

It was supereasy and I whipped it up in about an hour. All you need are two 21 inch squares of fabric (one for the outside and one for the lining) and some purse handles. The pattern and directions to create your own can be found for free here.
It would be a great first sewing project for anyone!

Robbie's Quilt

As you can imagine, quilting requires a good deal of space. You have to store your sewing machine, fabric, notions, and quilting tools. You have to have the floor space to lay out and baste your quilt sandwich. Quilting also creates quite a mess. Fabric scraps and string show up everywhere, and stray pins always seem to make their way onto the floor. Most people deal with this by turning an office or a spare bedroom into a sewing room. Living in a tiny apartment in the city, I did not have that luxury. Instead, my sewing happens in the living room. My machine is on an old TV stand on wheels and I wheel it right up to the couch when I sew. I spread my tools, fabric, ironing board and patterns out all over the room and get to work. Robbie is very patient with all of this. He doesn’t mind (too much) the fact that most times we sit down to watch a movie the sewing machine comes out, possibly obstructing his view of the television and forcing him to relocate. He puts up with a string covered rug. Sometimes he even helps me press my seams. But after three quilts he was starting to complain. Not about the mess, but about the fact that I had made three quilts and none of them were for him. So I went about choosing a design and fabric for a “manly” quilt. My taste in quilts is very girly. I like appliqué flowers in pinks and greens. I knew I would have to put aside my preferences in order to piece a quilt for a guy. But I also knew I had to choose a pattern that I was interested in or I would never finish the dang thing. So I searched and searched and finally found another sampler quilt in autumn (read: manly) colors. I knew it would be the perfect quilt for me to use to practice my quilting skills. I bought it as a kit, and I was not very happy with the quality of the fabric. It was thin and felt flimsy. But I stuck with it, and Robbie’s Quilt was soon pieced.


I practiced some more freehand quilting.


I also machine stitched the binding down as it was another big blanket.
I decided to back it in flannel so it would be soft and cozy. Back to the Internet to research how to do that. I read that I needed to pre-wash and dry the flannel, and maybe more than once, because it would shrink considerably. I did so, and found that the shrunken flannel was no longer big enough to cover the back of the quilt. Ok, not to panic. Ok, I panicked a little. But then I remembered a blog post about pieced backings. Oh yeah. Who said the back of the quilt has to be all one print, or even one type of fabric?? So I added an off-center strip of the boarder fabric, and voila! Problem solved.


Quilt #3: A Lesson in Applique

I loved the look of my sampler quilt, but it was really quite small. Calling it a quilt is really an exaggeration. Truthfully it’s wall-hanging size. I was ready to create a real blanket, and I was dying to try appliqué. So I went back to the Internet to peruse the thousands of patterns available and choose my next project. I finally found a pattern I liked in turquoise, brown, and orange. Those are not my go-to colors (I’m more of a pink and green girl) but I decided to step (quilt?) out of the box for this one. I liked that the blocks were big and went together fast. Even though it was considerably bigger than my first two quilts the size of the blocks meant it didn’t take very long to piece.


The appliqué around the flowers was easy and quick as well.


To quilt it, I mostly stitched in the ditch, but I did try a checkerboard pattern around the big flower (How cute is that rick-rack stem?!)


I was so excited to be finished such a large quilt that I couldn’t imagine spending hours and hours hand stitching the binding down. So I went back to the trusty Internet to do some research on machine binding. I found a method I liked and tried it.

As you can see, my sewing skills leave a lot to be desired. Without my handy-dandy quarter-inch foot I have a lot of trouble sewing a straight line.You can also see where my stitch came out of the ditch a little on the brown boarder. I still need some practice!

The First Quilt

So I bought a (very) inexpensive sewing machine on Amazon (which turned out to be great…I would highly recommend it to any new sewer), scoured the Internet for a beginner-friendly kit, made a trip to Jo-Ann’s for all of the quilty supplies I would need (rotary cutter, specialty rulers, the right thread), attached my quarter-inch foot, and I was ready to go! I did the majority of my research online. I had to learn how to properly cut, piece, quilt, and bind my project. I also had to learn the quilter’s lingo (batting, backing, binding, half-square triangle, miter, WOF, jelly roll, charm square, etc.) By the time the kit arrived I couldn’t wait to get started. Even though I was signed up for a beginning quilter’s class later that month I just had to try this one on my own. A week of cutting, sewing, and burning myself with the iron later, this quilt (fabric: Verna by Kate Spain) was born.


Pretty good for a first effort if I do say so myself. I stitched in the ditch and did ok with that, but quickly learned that I much prefer piecing to quilting. (For all of you non-quilty people out there, that means I liked sewing the pieces of fabric together to make a quilt top much more than I liked stitching through the quilt top, batting, and backing to secure all of the layers. Part of this may be because my sewing machine has a very small throat (neck??) so it was hard to bunch all of the fabric in there when It was time to sew the middle of the quilt.


The binding was a different story. I didn’t really understand mitering, or what a mitered corner should look like. I didn’t get how to hand stitch the back of the binding down so the thread wouldn’t show, so I made up my own way.


See how you can see those mini stitches? (You do have to look kind of hard...it's much more obvious in real life.) It took about three more quilts before I felt comfortable attaching the binding, and I still have trouble once I get around the whole quilt and have to attach the beginning of the binding strip to the end. Binding trouble or not, I was very proud to have finished The First Quilt!!

Quilting Class

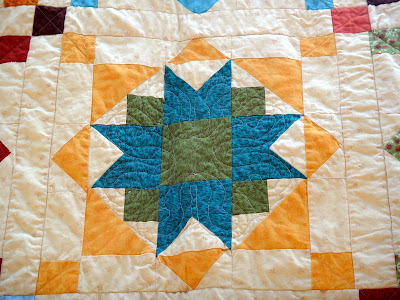
Soon after I finished The First Quilt I attended the first of 6 sessions of a beginners quilt class at Bear’s Paw Fabrics. I joined a group of about 8 women and I definitely stood out. I was the youngest one there and clearly the only one remotely interested in fashion. (One of them was wearing a t-shirt with a picture of her cat on it. Seriously.) They were all very nice but most of them were not crafty at all. A few knew how to sew, but most of them had stories like, “I inherited this sewing machine from my grandmother’s friend’s cousin and I signed up for this class to learn how to use it.” The first class focused on rotary cutting, something I was already pretty comfortable with from my online research and from the fact that I have common sense. Squaring up the fabric was an impossible concept for some of these ladies. After that first class I realized that the most I could hope for from this class was to learn some helpful tips and get some more practice. We ended up getting to work at our own pace, and the sessions became more workshopy and less “watch me and then try it”. One part that I really enjoyed was the chance to practice free-motion quilting (quilting designs other than straight lines). A few weeks after the class ended Quilt #2 was quilted and bound!!


I sharpened my free-motion skills by stitching a different design in each block. I must admit-they were not exactly done using “free motion”. I actually traced a design I liked and pinned the tracing paper to the quilt top. Then I used the free-motion foot to “trace” over the design with my needle. Lastly I tore the tracing paper away leaving a neat design on my quilt. My stitches are neither even nor straight, but as it was my first try and I don't have a top of the line machine, I'm ok with the result.