CLICK HERE FOR FREE BLOG LAYOUTS, LINK BUTTONS AND MORE! »

Saturday, August 20, 2011

Building Cornhole

Robbie and I have been talking about building a cornhole set for a while. A few weeks ago he came to the beach and we decided to do it. We drove to Home Depot and got all of the supplies, came home, and got to work. First we cut and assembled 2 x 4s into a frame.
Then we screwed on a plywood top and cut a hole in it. We cut and shaped the legs as well.

Then it was time to paint!

The whole project took about a week (we had to wait a long time between coats of primer/paint).

I also made the bags. I had extra corn so I made five of each color in case one breaks or gets lost.

This was a great project and the boards should last for a long time!

Saturday, August 13, 2011

A Laptop Case

My school recently upgraded my laptop to a brand new Tablet PC. It is awesome and I wanted to make a sleeve to protect it since I carry it in a tote back instead of the ugly black laptop case. I found this tutorialwhich was perfect. It didn't take long before I had this:

Here is what it looks like from the back:

I chose the red, yellow, and blue flower fabric for the lining. The laptop is snug and protected inside this cute new case!


Wednesday, August 10, 2011

Oldies But Goodies

I have been needlepointing and cross-stitching for about 15 years. But I never seem to finish anything. And when I do, it just seems to sit there. Well I finally decided to do something about it. I got out these two finished flip-flop pieces and plan to frame them and hang them in the laundry room/bathroom at the beach.
I did these during the summer after college. I worked in a clothing boutique and cross-stitched when nobody was shopping. I enjoyed some fun, relaxing days that way. The lighthouse took me about three years. I don't cross-stitch often, but it's a good way to pass the time as a passenger on long car rides. This will also go up on a wall at the beach house. If you click on the pictures you will get a close up view of all the detail. Don't mind the stains...I told you, they have been balled up in a basket for a few years...

Saturday, August 6, 2011

Classroom Dec

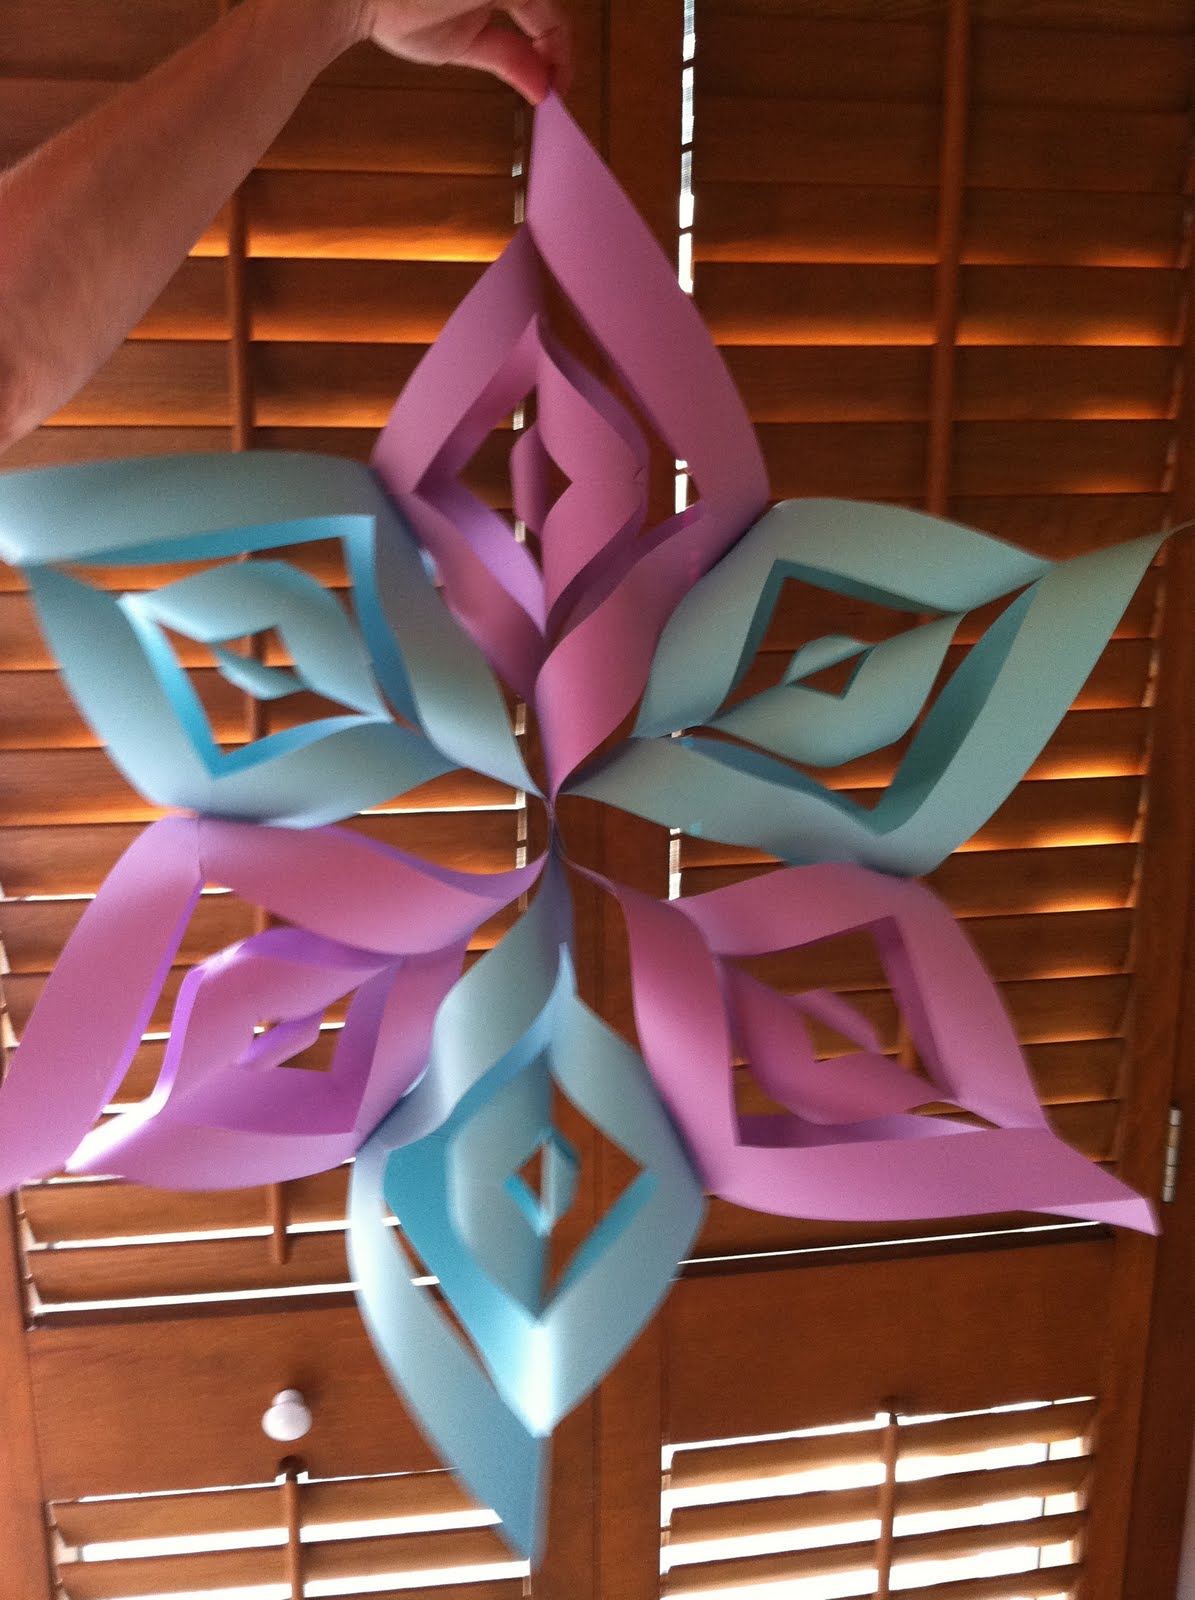
I made these huge stars out of six 12 x 12 pieces of scrapbook paper. The tutorial can be found here.

I made one polka-dotted star and two blue and purple stars. I plan to hang all three from the ceiling of my classroom to add a little pizzaz. They are supereasy to make and I completed all three in under an hour. Just fold the paper, measure, cut, and staple! I would love to find some more double sided scrapbook paper as that makes the more interesting stars.

Wednesday, August 3, 2011

Halloween quilt top

I pieced the squares together and added boarders to finish the quilt top.


There are a few first in this quilt. It was my first time paper piecing. The jack-o-lantern's nose/cheeks are paper pieced. I liked how clean and crisp the corners were but I didn't like how much fabric was wasted. It will also be the first time that I try a scalloped boarder, but that will come after the basting and quilting. I was excited to get started with that part(not really, as it's my least favorite part), but when I went to get the backing fabric I realized I had left it at home (I'm at the beach for a few weeks). Robbie is coming tomorrow night and will bring it, but in the meantime I've been working on some other projects which I'll post about soon!

Monday, August 1, 2011

More Halloween Blocks

I worked all week on my Halloween blocks. The ghosts were definitely the easiest; thank goodness I did them first. Then I did this cute jack-o-lantern.


He wasn't too hard, but there were lots of little pieces. Or so I thought. Next came the bat. Ohhh, the bat.


He's only 6.5 inches square instead of 12.5 like Jack.Some of those little pieces were 1.25 inch squares! Needless to say, the block is a little wonky (and sorry for the string that was somehow invisible when I took the picture but is now very obvious), but I think I can make it work once I piece the whole top. Then came this interesting block. Can you tell what it is?


It's the top of a witch head (mostly her hat). She will get applique eyes and a nose that hangs down onto the block below her.
And finally came these two star blocks.

See how they are opposites of each other? I really liked learning the technique for these blocks. Just take two squares of fabric and lay them on top of each other. Then make a cut through both blocks (where you see an orange strip) and sew one of each type of fabric to either side of an orange strip. Now you have two blocks that each contain both fabrics. Stack them on top of each other again, making sure to line up the orange strips as best as you can, and make another cut. Sew one part of the top block to the other part of the bottom block (with an orange strip in between). Keep doing this until you have made all five cuts and re-attached the blocks with the orange strips. If you took care to always sew one part of the top block to the other part of the bottom block and vice versa, you will end up with two blocks like those in the picture above. Easy peasy! (Next time I'll take pictures as I work so that the directions are more clear)

Wednesday, July 27, 2011

Ghosts

I have started on a Halloween Sampler quilt. I'm usually not into these holiday themed fabrics (except for the Christmas ones, which I love) but I wanted to make something that my students would like to have around the classroom. I have made the six ghost blocks so far. Two each in three black on white fabrics.

I appliqued the eyes and nose.

I still have to cut and piece a bat block, a pumpkin block, a witch block, and two star blocks. I have also started starching my fabric for more precise cutting and piecing. I'm not sure how much of a difference it's making, but I do like the feeling of the stiff fabric.